


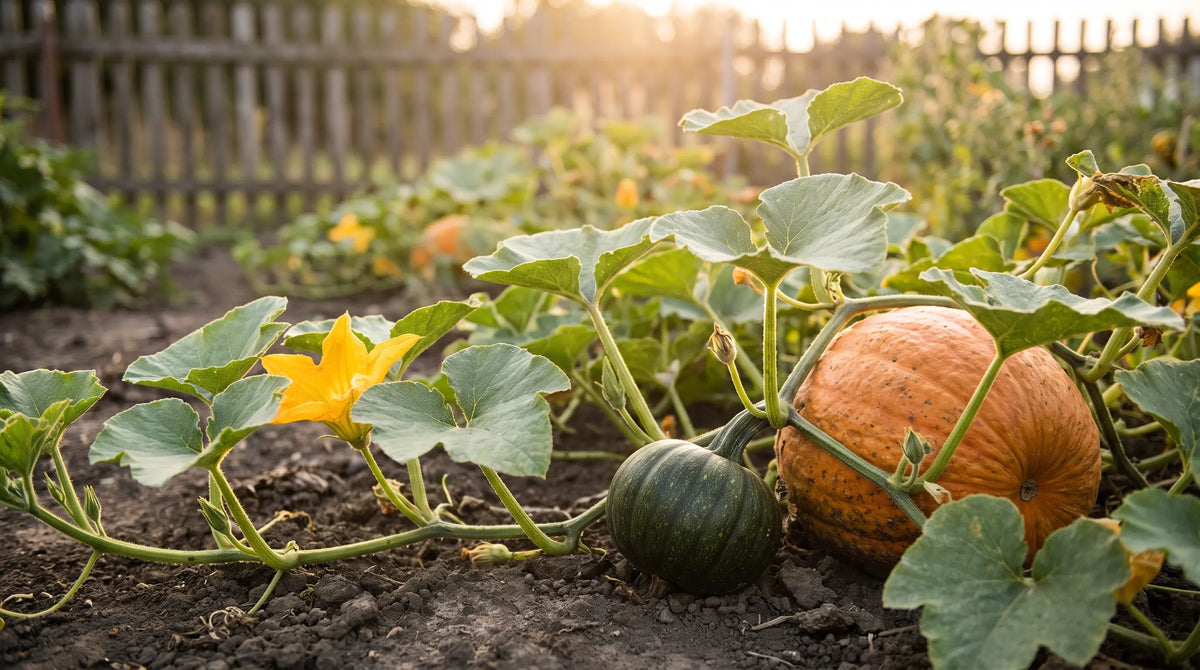
Pumpkin Growing Stages: From Seed to Jack-o'-Lantern
Updated October 2026
You want a porch full of pumpkins by October, and right now you are holding a packet of seeds wondering how a flat little kernel turns into a hefty jack-o'-lantern. The good news is that pumpkins follow a predictable rhythm. Once you know what each stage looks like and roughly how long it lasts, you stop guessing and start reading your plants like a book.
Most pumpkins take somewhere between 90 and 120 days from sowing to a hard, ripe fruit, and the number printed on your seed packet as "days to maturity" is your anchor. Count backward from your average first fall frost, then add two weeks of cushion for slow germination and a cool spring, and you land on your sowing date. In much of the country that means dropping seeds in late May or early June for a Halloween harvest. One thing worth knowing up front: pumpkins hate having their roots disturbed, so direct sowing usually beats transplanting unless your season is genuinely short.
Stage 1: Seed and Germination (Days 1 to 10)
Pumpkin seeds want warm soil, not warm air, and this is the single most common place people go wrong. Wait until the ground holds steady at 70 degrees or higher at a two inch depth, because seeds sown into cold, wet dirt sit there and rot before they ever crack open. A cheap soil thermometer settles the question in seconds and saves you a whole replant. Plant about one inch deep, point-end down if you are placing them by hand, then water gently and keep the bed evenly moist, never soggy.

In roughly 7 to 10 days you will see the seed push up two smooth, oval leaves called cotyledons. These are the seed's built-in lunchbox, feeding the seedling until the real leaves arrive and start photosynthesizing. If you started indoors, use deep pots or soil blocks and sow no more than two to three weeks before your last frost, because a root-bound pumpkin seedling sulks for weeks after transplant.
Sale

Sugar Pie Pumpkin Seeds – Non-GMO HeirloomBest for piesA compact, sweet-fleshed pie pumpkin that ripens on the earlier side, ideal if you want baking pumpkins from a smaller bed.
Price$4.99Starting at$3.99
Stage 2: Seedling and True Leaves (Days 10 to 21)
After the cotyledons come the true leaves, and they look nothing like the first pair. They are broad, lobed, and slightly scratchy, and once you count two or three of them the plant is ready to work. If you sowed several seeds per hill, thin down to the two strongest now by snipping the extras at soil level with scissors rather than pulling them, which protects the roots of the keepers you are leaving behind.
Seedlings are tender and this is the easiest stage to lose. A late cold snap, a hungry cutworm, or one dried out afternoon can end them fast. Cutworms in particular will fell a healthy seedling overnight by chewing through the stem at the soil line, so a simple collar (a toilet paper tube pushed an inch into the dirt) is cheap insurance. Keep the soil damp, watch for slugs after rain, and give them full sun, meaning six to eight hours minimum.
Stage 3: Vining and Leaf Growth (Days 21 to 45)
Now things get dramatic. The plant stops growing up and starts running out, sending long vines across the bed that can stretch well past ten feet on large varieties. Big, umbrella-sized leaves unfurl to catch sun and shade the soil. Along the ground the vine puts down secondary roots at the leaf nodes for extra anchorage and water uptake, so try not to keep flipping or repositioning vines once they settle, since tearing those roots sets the plant back.
This is the stage that builds the engine. The vines and leaves you grow now are the factory that will later fill your fruit, so this is where nitrogen earns its keep. A balanced feeding or a side-dressing of compost keeps the leaves dark green and working. Water deeply once or twice a week rather than a daily sprinkle, aiming to soak the root zone so roots chase moisture downward instead of staying shallow. Try to keep water off the foliage and water in the morning, because powdery mildew loves wet leaves and humid evenings. If you are short on space, a compact bush type keeps the sprawl in check while still delivering.
Sale

Connecticut Field Pumpkin Seeds – Non-GMO HeirloomCarving classicThe classic carving pumpkin, big vines and big orange fruit built for jack-o'-lanterns and fall displays.
Price$4.99Starting at$3.99

Early White Bush Scallop Squash Seeds – Non-GMO HeirloomSpace saverA tidy bush-type squash for gardeners short on space who still want a fast, productive harvest.
Price$4.99
Stage 4: Flowering (Days 45 to 70)
The first flowers you see are almost always male, and they open a week or two before the females show up. That is completely normal, so do not panic when those early blooms open, fade, and drop without setting fruit. Telling them apart is easy once you know the trick. Male flowers sit on a thin straight stem, while female flowers have a tiny round bump at the base, a miniature pumpkin waiting for pollination.
Bees do the matchmaking here, and each female flower opens for a single morning before closing for good, so it needs pollen delivered fast. If your fruit keeps shriveling and yellowing at golf-ball size, poor pollination is almost always the culprit, not disease. You can step in yourself. Early in the morning, snap off a freshly open male flower, peel back its petals, and dab the pollen directly onto the sticky center of a female bloom. One male will usually cover two or three females. If bees are scarce in your yard, plant a few flowers nearby and go easy on insecticides during bloom to keep pollinators coming.
Stage 5: Fruit Set and Growth (Days 55 to 90)
Once a female flower is pollinated, the little bump behind it swells fast. This is the most satisfying stretch to watch, because a well-fed pumpkin can gain noticeable size day by day. Keep the water steady and consistent now, since the swing from bone-dry to soaking is what triggers cracking and blossom end rot. Blossom end rot is a calcium delivery problem driven by uneven watering, not usually a lack of calcium in the soil, so consistency fixes it more reliably than any additive.
Two habits pay off here. Slide a board, a shingle, or a thick pad of straw under each fruit to lift it off damp soil, which keeps the resting side from rotting. And once you have three or four good pumpkins set on a vine, pinch off the fuzzy growing tips a couple of leaves past the last fruit. That tells the plant to pour its stored energy into finishing the fruit you already have instead of chasing new blooms it will never ripen before frost. If you are chasing one giant showpiece, take it further and cull down to a single fruit per plant.
Stage 6: Ripening and Color Change (Days 85 to 120)
The green fades and the true color deepens, whether that is classic orange, buff, or white depending on what you planted. As ripening finishes, the rind hardens, and that hardness is your real test of ripeness, not color alone. Press a fingernail into the skin in an inconspicuous spot. If it resists and will not dent, the pumpkin is ready. A hollow, drum-like sound when you thump it and a stem that is drying and turning corky are two more reliable signs. As the fruit finishes, ease off the water in the final week or two to help the rind cure hard and concentrate the flavor in eating types.
Let fruit ripen fully on the vine whenever the weather allows. A pumpkin picked green will color up somewhat off the vine, but it will never build the same hard shell or long storage life as one left to finish where it grew. The exception is frost. A hard freeze damages the rind and ruins storage, so if one is coming, harvest what has good color and bring it in.
Stage 7: Harvest and Curing
Cut, never twist or carry by the stem, and leave a handle three to four inches long. A pumpkin whose stem has snapped off has an open wound right where rot starts, so that handle is not decoration, it is a seal. Use a sharp knife or loppers, and handle each fruit like an egg, because a bruise you cannot see today becomes a soft, mushy spot in storage next month.
After harvest comes curing, the step most people skip and then wonder why their pumpkins collapse by Thanksgiving. Set them in a warm, dry, well-ventilated spot, ideally around 80 to 85 degrees, for about ten days to toughen the skin and heal small nicks. Cured properly and kept off cold concrete on a shelf or a bit of cardboard, a good storage pumpkin or winter squash holds for two to three months in a cool, dry room around 50 to 55 degrees. The ones you plan to carve get to skip curing and go straight to the porch.
Quick Stage Timeline
| Stage | Rough Timing | What You See |
|---|---|---|
| Germination | Days 1 to 10 | Two smooth seed leaves |
| Seedling | Days 10 to 21 | First true, lobed leaves |
| Vining | Days 21 to 45 | Long runners, big leaves |
| Flowering | Days 45 to 70 | Male then female blooms |
| Fruit set | Days 55 to 90 | Pumpkins swelling fast |
| Ripening | Days 85 to 120 | Color deepens, rind hardens |
| Harvest and cure | Day 90 plus | Hard shell, dry stem |
Read your plants at each step and the whole season stops feeling like a gamble. Sow into warm soil, water deeply and evenly, help the bees along when they need it, and let the fruit finish on the vine.
Related guides
- 13 Types of Basil and How to Use Each One in the Kitchen
- Companion Planting Chart: What to Plant Together (Full Vegetable Guide)
- Types of Beans: A Complete Guide to Bush, Pole, Snap & Shell Varieties
- Types of Cucumbers: Slicing, Pickling & Specialty Varieties Explained
- Types of Melons: 15 Varieties from Cantaloupe to Honeydew
Frequently asked questions
How long does it take to grow a pumpkin from seed?
Most pumpkins take 90 to 120 days from sowing to a fully ripe fruit, depending on the variety. Smaller pie types finish faster, while giant carving pumpkins sit at the long end. Check your packet's days to maturity, then count backward from your first fall frost to pick a planting date.
When should I plant pumpkin seeds for Halloween?
In most regions, sow in late May or early June, and wait until soil temperature holds at 70 degrees or higher rather than going by the calendar alone. That gives the plant the 90 to 120 days it needs to ripen before your first frost, landing your harvest right around October.
Why are my pumpkin flowers falling off without making fruit?
Early flowers are usually male, and they naturally open and drop after a day. Female flowers, the ones with a small pumpkin at the base, come a week or two later. If female blooms shrivel at golf-ball size, the cause is almost always poor pollination, which you can fix by hand-pollinating.
How do I know when a pumpkin is ripe to pick?
Look for deep, even color and a rind so hard it resists your fingernail without denting. A dry, corky stem and a hollow sound when thumped are strong signs too. Ripen fruit on the vine when you can for the hardest shell and best storage, but bring it in ahead of a hard frost.
Do pumpkins need to be cured after harvest?
Carving pumpkins can go straight to the porch, but storage pumpkins keep far longer if cured. Set them in a warm, dry, well-ventilated spot for about ten days to harden the skin and heal small nicks. Cured well and kept off cold floors, they last two to three months in a cool, dry room.

- Choosing a selection results in a full page refresh.









 Easy Returns 30-day guarantee