


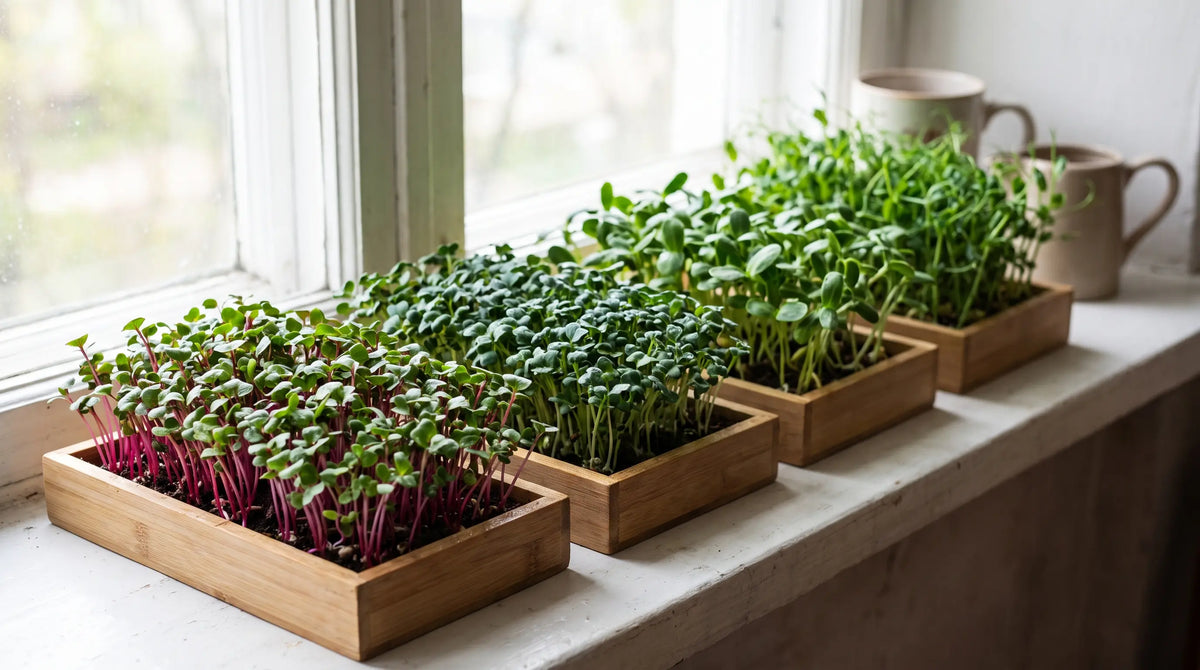
20 Best Microgreens to Grow for Beginners
Updated July 2026
Microgreens are the shortest path there is between a packet of seed and something you can actually eat. There is no garden bed to dig, nothing to transplant, and no season to wait out. You scatter seed over damp soil, keep the tray covered for a few days, move it to a bright window, and cut the crop with a pair of scissors a week or two later.
That speed is also what makes them forgiving. When a tray goes wrong you have lost a few days and a spoonful of seed, not a summer of work. The catch for a first-time grower is that not every microgreen behaves the same way. Some germinate in two days and stand up straight with no help at all. Others want soaking, weight on top, or two extra weeks before they look like anything.
This is a ranked comparison of the 20 microgreens that work best for beginners, starting with the ones that are hardest to fail with and finishing with the ones worth trying after a few trays are behind you. Each entry gives the flavor, the realistic time from sowing to harvest, and what the crop asks of you. If you want the full method rather than the shortlist, our complete guide to growing microgreens from seed walks through setup, watering and harvest in detail.
What makes a microgreen easy to grow
Germination speed. A seed that breaks the surface in two or three days is a seed that beats its own problems. Fast crops outrun mold, use up the water you gave them, and reach the light before a beginner has time to fuss with the tray. Radish, mustard and turnip do this reliably, while cilantro can sit in damp soil for a week before anything happens.
Seed size and prep. Small brassica seed, which covers radish, broccoli, kale, cabbage, kohlrabi, cauliflower and bok choy, is sown dry, straight from the bag. Large seed, meaning peas, sunflower, wheatgrass, buckwheat and corn, does better after eight to twelve hours in cool water. That is not a hard step, but it has to happen the night before rather than on impulse.
How the crop holds itself up. Most microgreens stand on their own. Sunflower and pea push against a weighted tray for the first few days to build strong stems and, in the case of sunflower, to shed their hulls. A first tray goes more smoothly when nothing has to be stacked or timed.

The 20 best microgreens for beginners, compared
The table below is the short version, ordered from easiest to hardest. Growing times assume a warm room and a bright window, and they run from the day you sow to the day the first true leaves show and the crop is worth cutting. Detail on each one follows underneath.
| Variety | Flavor | Growing Time | Nutrition |
|---|---|---|---|
| Radish | Sharp and peppery, like a young radish root | 5 to 8 days | Rich in vitamin C |
| Broccoli | Mild, faintly cabbage-like, easy on kids | 8 to 12 days | Source of vitamin C and vitamin K |
| Pea shoots | Sweet, green, tastes like a fresh pea pod | 8 to 12 days | Source of vitamin C and folate |
| Sunflower | Nutty and crunchy with a thick stem | 8 to 12 days | Source of vitamin E and plant protein |
| Mustard | Hot and sinus-clearing, like wasabi's cousin | 6 to 10 days | Source of vitamin A and vitamin C |
| Kale | Mild and cabbage-sweet, sturdy leaves | 8 to 12 days | Source of vitamin K |
| Cabbage | Clean and sweet, very mild | 8 to 12 days | Source of vitamin C |
| Arugula | Peppery and nutty, stronger than the salad leaf | 6 to 10 days | Source of vitamin K and calcium |
| Kohlrabi | Mild and sweet with a crisp stem | 8 to 12 days | Source of vitamin C |
| Bok choy | Juicy, mild, gently mustardy | 8 to 12 days | Source of vitamin A and vitamin C |
| Turnip | Mild at first with a spicy finish | 6 to 10 days | Source of vitamin C |
| Cauliflower | Very mild, close to broccoli | 8 to 12 days | Source of vitamin C |
| Wheatgrass | Grassy and sweet, usually juiced | 8 to 10 days | Known for its chlorophyll content |
| Buckwheat | Lemony and succulent, slightly sour | 8 to 12 days | Source of minerals and plant compounds |
| Corn shoots | Sweet as corn on the cob, grown in the dark | 8 to 12 days | Source of B vitamins |
| Beet | Earthy and sweet, crimson stems | 10 to 16 days | Source of folate |
| Chard | Earthy and mild, rainbow stems | 10 to 16 days | Source of vitamin K |
| Amaranth | Mild and earthy, deep magenta color | 10 to 14 days | Source of iron and calcium |
| Basil | True basil flavor, softer and sweeter | 12 to 20 days | Source of vitamin K |
| Cilantro | Full cilantro punch on a tiny leaf | 14 to 21 days | Source of vitamin K and vitamin A |
The 20 varieties in detail
1. Radish microgreens
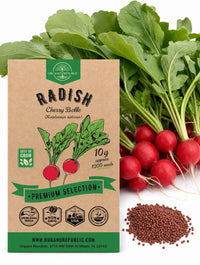
Radish is the crop to start with. The seed germinates in two days, needs no soaking and no weight, and is ready to cut in five to eight days. The stems come up pink or white depending on the variety, the leaves are broad, and the flavor is unmistakably radish: sharp, peppery and clean. It is the microgreen most likely to convince a skeptical household that a tray on the counter is worth the space. Our radish microgreens guide has the full timing.
Sale

Radish Sprouts & Microgreens Seeds – Non-GMO HeirloomNo soaking, no weight, cut in 5 to 8 days. The easiest first tray.
Price$19.99
Sale Price$17.99
2. Broccoli microgreens
Broccoli is the mildest of the fast brassicas and the one people eat the most of. The flavor is gentle and faintly cabbage-like, with none of the bite of radish, which makes it the easy sell for sandwiches and smoothies and for anyone feeding kids. Seed is sown dry and dense, germinates in two to three days, and cuts at eight to twelve days with thin white stems and small green leaves. See the broccoli microgreens guide for the details.
Sale

Broccoli Sprouting & Microgreen Seeds – Non-GMO HeirloomMild brassica, sown dry, cut at 8 to 12 days. Available in 4oz, 8oz and 1lb.
Price$12.99Starting at$9.99
3. Pea shoots
Pea shoots are the microgreen that tastes like a vegetable rather than a garnish, sweet and green and substantial enough to eat by the handful. They cost you one extra step: soak the seed eight to twelve hours before sowing, then keep the tray weighted or covered for three or four days so the shoots push up together. Harvest at eight to twelve days, cutting above the lowest leaf. Full timing is in the pea microgreens guide. We do not pack a dedicated pea microgreen bag, so use untreated pea seed, or browse the microgreens and sprouting seeds we do carry.
4. Sunflower microgreens
Sunflower gives you the thickest, crunchiest microgreen on this list, with a nutty flavor that holds up in a sandwich. It also asks more of a beginner. Soak the black oil seed overnight, sow it dense, and weight the tray so the shoots have to push, which is what forces most of them to shed their hulls. Cut at eight to twelve days, before the true leaves take over and turn bitter. The sunflower microgreens guide has the weighting and hull details.
5. Mustard microgreens
Mustard is radish-fast with a hotter edge, a clean burn closer to wasabi than to pepper. It germinates in two days, needs no soaking, and cuts at six to ten days. A little goes a long way, so most people sow a half tray of it next to something mild. We do not stock a mustard microgreen bag; if you want that heat now, radish and arugula are the closest crops in the microgreens and sprouting seeds range.
6. Kale microgreens
Kale grows like broccoli and tastes like a sweeter, softer version of the mature leaf, with none of the toughness. Sow dry seed dense, cover for three days, then bring it to light and cut at eight to twelve days. The leaves are sturdier than most brassicas, which means a cut tray keeps in the refrigerator for several days without wilting. We do not carry a kale microgreen bag, so check the microgreens collection for what is in stock.
7. Cabbage microgreens
Cabbage microgreens are among the mildest greens you can grow, clean and slightly sweet with a crisp stem. The seed behaves exactly like broccoli seed: sown dry, germinating in two to three days, cut at eight to twelve days. They are the variety to reach for when you want volume rather than flavor.

8. Arugula microgreens
Arugula is peppery and nutty, stronger as a microgreen than it ever is as a salad leaf, and it comes in fast at six to ten days. The seed is sown dry and gels slightly on first watering, exactly as the seed does in a garden bed. Keep the sowing a little lighter than you would for broccoli, since a dense arugula tray holds moisture at the base and can mat. Details in the arugula microgreens guide.
Sale

Arugula Microgreens Seeds – Non-GMO HeirloomPeppery and fast, cut at 6 to 10 days. Sow a little lighter than broccoli.
Price$14.99Starting at$12.99
9. Kohlrabi microgreens
Kohlrabi behaves like the other brassicas and tastes mild and sweet with a crisp, juicy stem. Purple varieties throw a violet stem that looks striking on a plate. Sow dry, cover for three days, cut at eight to twelve, and keep the soil line from staying wet. We do not stock a kohlrabi microgreen bag; the microgreens and sprouting seeds collection lists what we do carry.
10. Bok choy microgreens
Bok choy makes a juicy, mild microgreen with a light mustardy finish: dry seed, three days covered, cut at eight to twelve days. Bok choy belongs to the same species as Chinese cabbage, so the method is identical for both and our Chinese cabbage microgreens guide covers it step for step. Water underneath rather than over the top, since the stems hold water and the tray rots at the base if it sits soaked.
11. Turnip microgreens
Turnip germinates as quickly as radish, cuts at six to ten days, and tastes mild at first with a peppery finish that builds. If you like radish microgreens but want something a shade gentler for salads, this is the one to grow. We do not sell a turnip microgreen bag, so use the microgreens collection for the crops we do stock.
12. Cauliflower microgreens
Cauliflower rounds out the beginner brassicas. It is very close to broccoli in flavor and in habit, mild and clean, and it grows on the same schedule of eight to twelve days from dry seed. It is slower to fill a tray and the seed usually costs more, which is the only reason it sits behind broccoli here.
13. Wheatgrass
Wheatgrass is grown for juicing more than for eating, since the mature blades are too fibrous to chew comfortably. Soak the wheat berries eight to twelve hours, sow them dense on damp soil, keep the tray covered for two or three days, then grow it in light until the blades reach four to six inches, usually eight to ten days. It molds easily if the tray stays wet. We do not sell wheat berries; our microgreens and sprouting seeds are the salad crops on this list.

14. Buckwheat microgreens
Buckwheat is a lemony, succulent green with a slight sourness that cuts through rich food. Use hulled-in seed, meaning raw buckwheat groats still in their black hulls, and soak it briefly, no more than four to six hours, because long soaks turn it slimy. Cover for two or three days, then light. Cut at eight to twelve days, before the hulls fall onto the crop. We do not carry buckwheat seed.
15. Corn shoots
Corn shoots are the odd one out. Grown in the dark from start to finish, they come up pale yellow and taste startlingly sweet, like raw corn on the cob. Soak the kernels overnight, sow them dense, and keep the tray covered and dark for the full eight to twelve days, letting them stretch. Any light will green them up and turn them bitter. It is a fun crop, though it needs a dark cupboard. We do not sell corn seed.
16. Beet microgreens
The stems come up deep crimson, the leaves stay green, and a pinch of them changes how a plate looks. The tradeoff is time and patience: soak the seed overnight, expect uneven germination because each beet seed is a cluster that holds several seeds, and plan on ten to sixteen days. Watering is the thing to get right, since the seed sits in damp soil far longer than a brassica does. Our beet microgreens guide covers the soak and the timing.
Sale

Beet Microgreens & Sprouting Seeds – Non-GMO HeirloomCrimson stems, cut at 10 to 16 days. Soak the seed overnight before sowing.
Price$24.99
Sale Price$21.99
17. Chard microgreens
Chard is beet's close relative and grows the same way, down to the overnight soak, the clustered seed and the ten to sixteen day run. Rainbow types give you stems in yellow, pink and red, which is the whole reason to grow it. Anything in the beet microgreens guide applies here without change. We do not stock a chard microgreen bag, so see the microgreens collection for the crops we carry.
18. Amaranth microgreens
Amaranth grows the most vivid microgreen there is, a deep magenta stem and leaf. The seed is close to dust, which makes even sowing tricky, and germination is slower than a brassica. Give it ten to fourteen days and keep the surface only lightly damp, misting rather than pouring, until it establishes. We do not sell amaranth microgreen seed; the microgreens and sprouting seeds collection lists our current range.
19. Basil microgreens
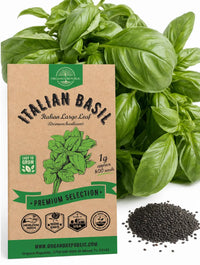
Basil as a microgreen tastes like basil, softer and sweeter than the mature herb, and it is worth growing once you can keep a tray alive without thinking about it. It is slow, twelve to twenty days, and the seed forms a gel coat when wet that makes it clump if you sow too heavily. Water from below, keep air moving over the tray, and resist the urge to soak it, since damping off is the usual failure. We do not sell a basil microgreen bag.
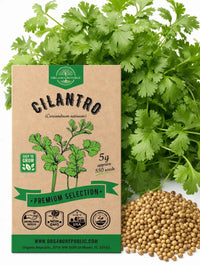
20. Cilantro microgreens
Cilantro is the slowest crop here and the last one to try. The seed is a hard husk that can hold two seeds, germination is uneven and can take a week or more, and the tray is not worth cutting for fourteen to twenty-one days. What you get in return is full cilantro flavor on a small, tender leaf, which is exactly what a taco or a bowl of soup wants.
Which microgreens to grow first
If you grow one tray this month, make it radish. It sprouts before you have time to worry about it, it does not need soaking or weighting, and it goes from seed to salad in under a week, which is the single best thing that can happen to a new grower. Once you have cut one radish tray and seen what a strong stand looks like, sow broccoli next for volume and mildness, then pea shoots or sunflower to learn what soaking and weighting actually do.
Arugula and curled cress are the natural third step: both are fast, both are peppery, and both teach you to sow a little lighter so the tray does not mat at the base. Our curled cress microgreens guide has the specifics.
Sale

Cress Microgreens & Sprouts Seeds – Non-GMO HeirloomFast peppery greens, cut at 6 to 10 days. A good third tray after broccoli.
Price$21.99
Sale Price$19.99
Leave beet, chard, basil and cilantro until you have four or five trays behind you. They are slow, and slow crops punish the habits a beginner has not shaken yet: too much water, not enough air, and impatience with a tray that still looks like bare soil on day five.
What you need
The kit is short: a shallow tray with drainage and a second tray underneath to water into, an inch and a half of fine seed starting mix or coconut coir, something flat to cover the tray for the first few days, a spray bottle, a bright window or a small LED light, and clean scissors. A takeout container with holes punched in the bottom will grow a first tray of radish.
Seed is the part worth being fussy about, because microgreens are eaten whole and raw and are sown far more densely than a garden crop. Use seed sold for sprouting and microgreens, untreated and germination tested. All of our microgreens and sprouting seeds are non-GMO heirloom seed, tested for germination in our US warehouse before packing, and every packet carries a QR code that opens the free growing guide for that crop.
For the full equipment list, including tray sizes, lighting options and what to use instead of soil, see the complete guide to growing microgreens.
How to grow microgreens, in short
Fill the tray with about an inch and a half of damp mix and level it firmly, then sow the seed thickly and evenly across the whole surface, so the seeds nearly touch. Small seed goes on dry. Large seed, meaning pea, sunflower, wheatgrass, buckwheat and corn, gets an eight to twelve hour soak first. Mist the surface, then cover the tray with a lid or a second tray to hold in moisture and darkness.
Leave it covered for two to four days, checking daily and misting if the surface looks dry. When the seedlings have lifted the cover and formed a pale, dense mat, take the lid off and move the tray to a bright window or under a light. Water from the bottom from that point on, pouring into the tray underneath so the leaves stay dry, and cut the crop with scissors just above the soil line when the first true leaves appear.
That is the whole method compressed. Timings, tray weights, blackout periods and troubleshooting for each crop are covered properly in the complete guide to growing microgreens from seed.

Common beginner mistakes
Overwatering is the mistake that ends most first trays. A microgreen tray needs damp, not wet, and standing water at the base is what turns a good stand into a slimy one. The next most common problem is confusing normal root hairs with mold. Fine white fuzz on the roots in the first days, evenly spread and gone when misted, is the plant. Gray, cobwebby growth with a musty smell in a wet patch is mold.
After that it is light and spacing. Trays grown in a dim room stretch, flop over and taste of nothing, so give them a genuinely bright window or a cheap LED light on a timer. Sowing so thickly that the seeds stack on each other traps moisture and invites rot. Cutting late is the quiet mistake, since most crops turn bitter once the true leaves take over.
Each of these has a fix, and the complete growing guide works through them one by one, including what to do with a tray that has already gone wrong.
Start with one tray
The whole cycle is short enough to teach you something every week. Sow radish today and you will be cutting it before the weekend after next, and by then you will know more about watering, light and sowing density than any article can tell you. Grow the easy crops until the routine is dull, then work down the list toward beet, basil and cilantro.
Everything on this list starts with seed that is meant to be eaten young. Our microgreens and sprouting seeds are non-GMO, heirloom and germination tested, and shipping is free on orders over $49.
Frequently asked questions
What is the easiest microgreen for beginners?
Radish is the easiest microgreen to start with. The seed needs no soaking, it sprouts in two days, it stands up straight without weight on the tray, and it is ready to cut in under a week. Broccoli and pea shoots are close behind and just as forgiving in a bright window.
What is the fastest microgreen to grow?
Radish is the fastest, ready to cut about five to eight days after sowing. Mustard, arugula and turnip follow at six to ten days. Speed matters for a first tray because a crop that clears the soil quickly gives mold and overwatering far less time to cause trouble.
How long do microgreens take to grow?
Most microgreens are ready in seven to fourteen days from sowing. The brassicas, radish, broccoli, kale and cabbage, sit at the short end. Beet and chard take up to sixteen days, and slow herbs such as basil and cilantro can need three weeks before they are worth cutting.
What microgreens should I grow first?
Sow radish first, then broccoli once you have cut a tray. Both germinate fast, tolerate uneven watering, and taste like something you will actually use. Save beet, basil and cilantro for later, when you have a feel for how much water a tray really wants.
Do I need to soak microgreen seeds before planting?
Small seeds such as radish, broccoli, arugula, kale and cabbage are sown dry. Only the large seeds benefit from a soak of eight to twelve hours in cool water: peas, sunflower, wheatgrass, buckwheat and corn. Soaking small brassica seed makes it clump and slows germination.
Can I grow microgreens without soil?
Yes. Hemp mats, coconut coir and other hydroponic pads all work, and they keep the harvest clean of soil grit. Soil holds water more evenly and is more forgiving for a first tray, so many growers start there and move to mats once watering becomes second nature.
What is the best growing medium for microgreens?
A fine, well-drained seed starting mix or coconut coir suits nearly every variety. Fill the tray about an inch and a half deep, level it, and dampen it before sowing. Avoid heavy garden soil, which packs down, drains slowly and invites mold in a shallow tray.
Do microgreens need direct sunlight?
They need bright light, not hard sun. A south-facing window gives most varieties enough light to green up and stand straight, though winter windows often fall short and cause stretching. A basic LED shop light on a timer keeps trays even and compact all year.
Can I grow microgreens indoors year-round?
Yes. Microgreens do not care about season or frost, only about light, water and a room around 65 to 75 degrees. With a light on a timer, you can cut fresh greens in January the same way you would in June, which is why so many growers keep trays going all winter.
How often should I water microgreens?
Keep the medium damp, never soaked. While the tray is covered, a light mist once a day is usually enough. After the cover comes off, water from the bottom by pouring into the tray beneath so the leaves stay dry, checking daily and letting the surface dry slightly.

- Choosing a selection results in a full page refresh.













 Easy Returns 30-day guarantee