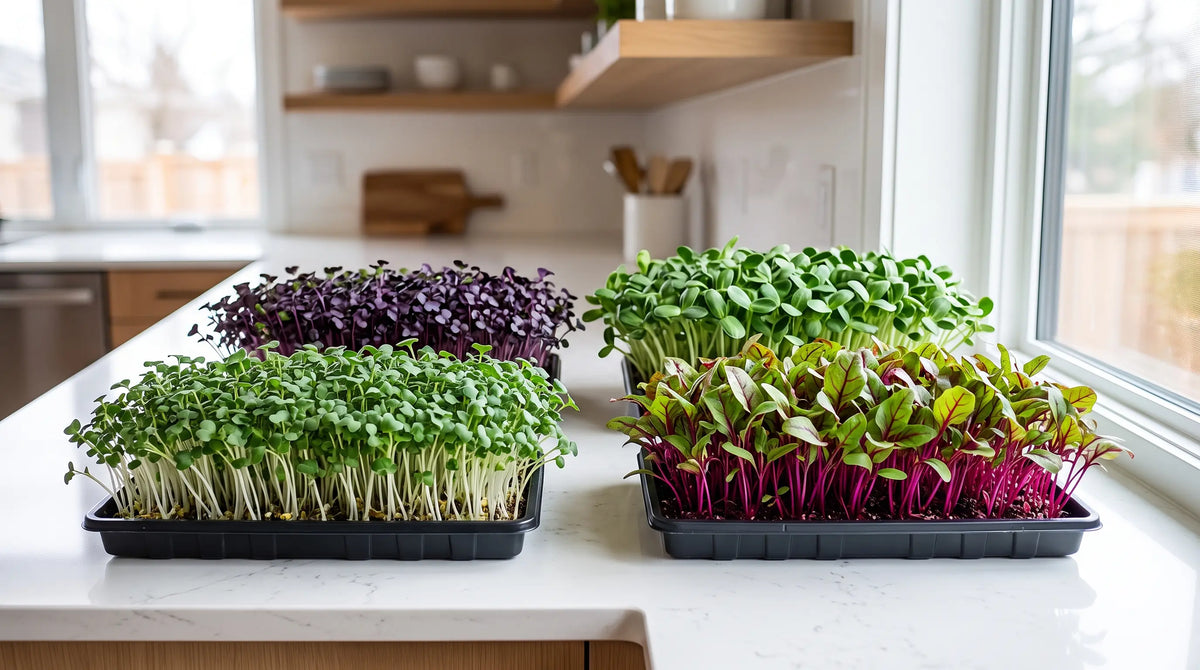
Trays of colorful broccoli, radish, beet, and sunflower microgreens at harvest on a kitchen counter

How to Grow Microgreens From Seed

Updated July 2026

Microgreens are young edible seedlings harvested when they are just 1–3 inches tall, usually within 1–3 weeks of sowing. Despite their small size, they are packed with concentrated flavor and dense nutrition. You can grow them indoors year-round on a sunny windowsill, with no garden, yard, or outdoor space required. They are the fastest crop you can grow, going from seed to harvest in a matter of days.

Best tip

The single most important thing is sowing at the right density and keeping the air moving. Sow the seed dense but in a single even layer so the crop knits into a lush mat, then give it good airflow and bottom-water so the leaves stay dry — that is how you avoid mold. The best part: you need no special equipment. A shallow container, a little mix or coco coir, and a bright windowsill are enough to grow a fresh harvest in about a week.

At a glance

Plant typeMicrogreen
SunBright light or grow light
Days to maturity7 to 21 days
Height1 to 3 in
WaterBottom-water; keep evenly moist

When to plant

Microgreens grow indoors year-round, so there is no season and no waiting for spring. Sow any day of the year on a bright windowsill or under a simple grow light.

Aim for a room temperature of about 65–75°F (18–24°C), which suits nearly every microgreen. Keep the trays out of cold drafts and away from hot radiators. To keep a steady supply on hand, sow a fresh tray every few days and rotate them — as one tray is harvested, the next is coming up right behind it.

How to plant

The method is nearly the same for every microgreen:

1. Choose your seed. Use seed sold for microgreens or sprouting, such as broccoli, radish, pea, sunflower, or beet.

2. Soak large seed. Small seeds (broccoli, radish, arugula) go in dry. Large seeds (sunflower, pea) do better with an 8–12 hour soak first.

3. Fill a shallow tray. Use a 1–2 inch layer of fine seed-starting mix or pre-moistened coconut coir in a shallow tray or container with a little drainage.

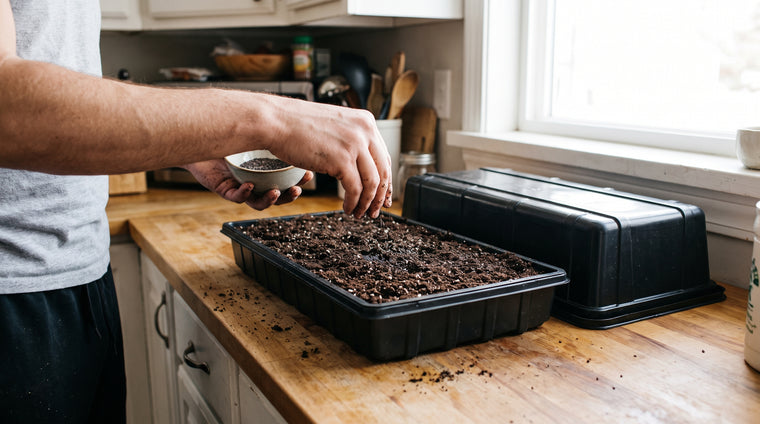
4. Sow dense and even. Scatter the seed across the surface in a single, even, crowded layer with minimal overlap. Do not bury it — just press it gently into contact with the mix.

5. Mist and cover. Mist the surface, then cover with a blackout dome or a second inverted tray to hold in moisture and darkness.

6. Blackout, then light. Keep it covered in the dark for about 2–4 days until the seeds sprout and lift the cover, then uncover and move it into bright light.

Sprinkle seed densely and evenly onto a moist tray, then cover with a blackout dome for 2–4 days.

Growing and care

Once the seedlings are uncovered, care is simple:

  • Light: give 12–16 hours of bright light a day from a sunny window or a grow light for stocky, colorful greens.
  • Water: bottom-water by adding water to the tray beneath so the foliage stays dry, and keep the mix evenly moist but never soggy.
  • Airflow: keep gentle air moving around the tray to discourage mold — a cracked window or small fan is plenty.
  • Cleanliness: start with clean trays and fresh mix, and avoid overwatering, which is the main cause of problems.
  • Temperature: hold a steady 65–75°F for even, healthy growth.

Do not panic over white fuzz. The most common beginner worry is mistaking normal root hairs for mold. Root hairs are fine, white, and halo the stem right near the seed, and they disappear when misted. Mold is slimy or cobweb-like, spreads across the soil surface, and gives off a sour, musty smell. When in doubt, improve airflow, water less, and sow more thinly — and always rinse microgreens before eating.

Harvest

Microgreens are ready when the cotyledon (seed) leaves are fully open and the first true leaves are just beginning to show, usually at about 1–3 inches tall and roughly 1–3 weeks after sowing.

To harvest, gather a handful and cut the stems with clean, sharp scissors just above the soil line. Harvest what you need fresh, or cut the whole tray at once.

Let the cut greens dry a little, then store them unwashed in an airtight container in the fridge and rinse just before eating. Most microgreens do not regrow after cutting — pea shoots are the one exception that may give a small second cut — so simply sow a fresh tray for your next harvest.

Uses

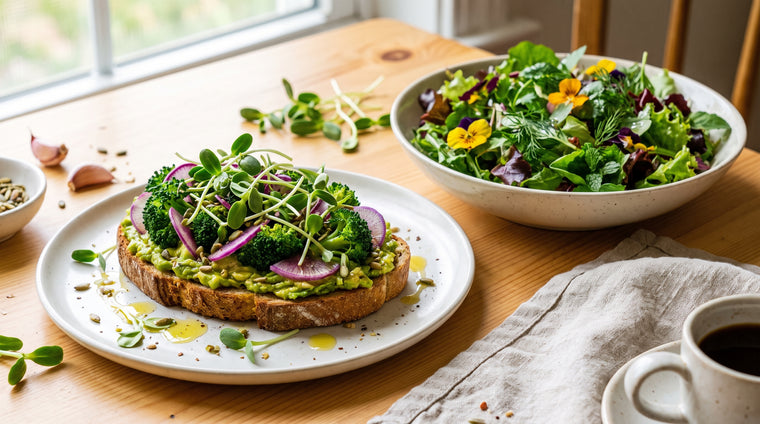
Microgreens add fresh flavor and color to almost anything. Pile them on salads, sandwiches, wraps, tacos, and grain or Buddha bowls, fold them into omelets, or scatter them over avocado toast, soups, and pizza as a garnish. Milder types like sunflower and pea also blend beautifully into smoothies.

Beyond flavor, microgreens are prized for nutrition: they are remarkably nutrient-dense, often carrying higher concentrations of vitamins and antioxidants than the full-grown plant. Brassica microgreens like broccoli and radish are an easy way to add compounds such as sulforaphane to your diet.

Fresh microgreens add flavor, color, and nutrition to salads, toast, and bowls.

Common problems

A few issues come up often, and all are easy to fix:

  • Mold vs. root hairs: fine white fuzz on the stems near the seed is usually harmless root hairs; slimy, cobweb-like growth spreading across the soil with a sour smell is mold — improve airflow, water less, and sow thinner.
  • Damping off: seedlings collapse at the base from overwatering — ease off the water and increase airflow.
  • Leggy or pale greens: tall, floppy, washed-out stems mean not enough light — move them closer to a window or grow light.
  • Uneven germination: patchy sprouting comes from uneven sowing or dry spots — sow more evenly and keep moisture consistent.
  • Stuck seed hulls: hulls clinging to the leaves can be reduced by misting and a gentle rub, or by using a light weight during the blackout stage.

Frequently asked questions

What are microgreens?

Microgreens are young, edible vegetable, herb, and flower seedlings harvested at just 1–3 inches tall, usually 7–21 days after sowing. You eat the whole seedling — stem and cotyledon (seed) leaves, sometimes with the first true leaves. They are more mature than sprouts but younger than baby greens.

Do you need special equipment to grow microgreens?

No. A shallow tray or even a recycled food container, a little seed-starting mix or coco coir, and a bright windowsill are enough to start. A 10x20 tray, a blackout dome, and a grow light make things easier and more consistent, but they are optional.

Do you need to soak the seeds first?

It depends on the seed size. Small seeds like broccoli, radish, and arugula do not need soaking — just sow them dry. Large seeds like sunflower and pea benefit from an 8–12 hour soak before sowing to speed and even out germination.

How much light do microgreens need?

After a 2–4 day blackout period, uncover the tray and give the microgreens 12–16 hours of bright light per day. A sunny south-facing windowsill works, but a simple grow light produces stockier, more even greens and prevents the pale, leggy stretch that happens in low light.

How long until microgreens are ready to harvest?

Most microgreens are ready in about 1–3 weeks. Fast crops like radish and broccoli can be cut in 7–10 days, while others take up to 21 days. Harvest once the cotyledon leaves are open and the first true leaves begin to appear.

Are microgreens safe to eat, and how do I avoid mold?

Yes — grown clean, microgreens are safe and nutritious. Prevent mold by sowing seeds less densely, providing good airflow, bottom-watering to keep foliage dry, and not overwatering. Note that fine white fuzz on the stems near the seed is usually harmless root hairs, not mold; true mold is slimy, cobweb-like across the soil, and smells sour.

Do microgreens regrow after cutting?

Most microgreens do not regrow once cut, because you harvest them above the growing point and they have little stored energy. Pea shoots are the main exception and can sometimes give a small second cut. For a continuous supply, sow a fresh tray every few days.

Ready to grow your own microgreens? Start with a beginner-friendly, non-GMO variety like broccoli and you can be harvesting fresh greens in about a week. Browse our microgreen & sprouting seeds to pick your first crop.

Broccoli Sprouting & Microgreens Seeds
Broccoli Sprouting & Microgreens SeedsNon-GMO, heirloomBroccoli is the best-selling, easiest microgreen to start with — non-GMO & nutrient-dense.$12.99$9.99
View product

Popular microgreen varieties to grow next.

Radish Sprouting & Microgreen Seeds
Radish Sprouting & Microgreen SeedsNon-GMORadish microgreens — fast-growing with a bright, peppery kick.$19.99$17.99
View product
Beet Sprouting & Microgreens Seeds
Beet Sprouting & Microgreens SeedsNon-GMOBeet microgreens — striking magenta stems with an earthy-sweet flavor.$24.99$21.99
View product
Arugula Sprouting & Microgreens Seeds
Arugula Sprouting & Microgreens SeedsNon-GMOArugula microgreens — tender green leaves with a nutty, peppery bite.$14.99$12.99
View product
Maxim Kaufman, Founder and CEO of Organo Republic

By Maxim Kaufman — Founder & CEO, Organo Republic

Maxim founded Organo Republic in 2017 and personally selects, tests, and grows the heirloom, non-GMO varieties the company offers. Under his leadership, Organo Republic was named Agri Business Review’s Top Non-GMO Seed Variety Solution 2026.